Zines are tricky to define, and I have to admit that up until recently, I wasn’t sure what separated them from magazines or any other independent publication.
But since then, I’ve begun creating my own zine, and I’ve also been reading plenty of other people’s, too. In the process, I’ve learned a lot about this lesser-known world of independent publishing, and I’m going to share my knowledge with you so you can join in the fun.
What is a Zine?
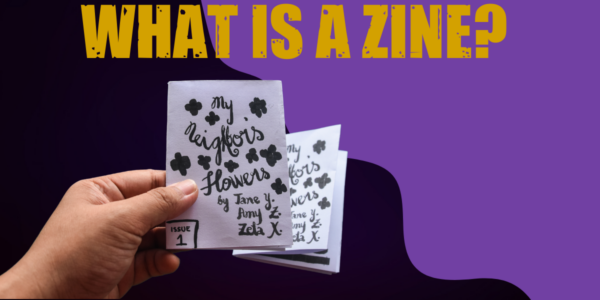
If you already know what a zine is, you might want to skip ahead and go straight to the instructions for making your own below. But if you need some clarification, let’s take a look at some of the key similarities and differences between magazines and zines.
- Like magazines, zines contain a wide variety of content, such as photographs, stories, articles, interviews, and advertisements. And while both are traditionally produced in printed form, online versions of each are common these days.
But one of the main differences between these two types of publications is the way they’re made.
- More often than not, magazines are produced by publishing companies, whereas zines are created, published, and distributed independently. This DIY approach is one of the major elements that sets zines apart from their more traditional magazine counterparts.
- You won’t find many zines on glossy paper with polished layouts and eye-catching ads. Instead, they tend to have a more lo-fi appeal that ties in with their handmade, independent nature.
- The content of magazines and zines also varies. While magazines often include various topics and themes in the same publication, zines usually take a more niche approach. They’re a popular way of sharing controversial and fringe ideas that exist outside of the mainstream, as well as creative content, such as art, poetry, and music.
- Another common difference between the two is the frequency of publication. Magazines tend to come out once a week, once a month, or once a quarter, whereas zines don’t follow such a strict schedule.
- Zines are also usually smaller than a traditional magazine and bound together by hand. Plus, since they’re almost always self-published, they tend to be distributed to a smaller audience.
In a nutshell, zines are a self-published, independent publication that sidesteps the mainstream rules and ideas found in magazines. They are often nonconformist, and unlike a magazine, anyone can produce and distribute a zine.
So if you’re passionate about something and want to spread your ideas with others, then why not make a zine and get your voice heard?
What Can You Put in a Zine?
Anything you want! There are no rules, and the only limit is your imagination. You can include any content you wish and input it either digitally or by hand.
While there’s an infinite number of zine topics and themes, here are a few popular examples.
- Art
- Poetry
- Short stories
- Book reviews
- Fanfiction
- Photography
- Independent and underground music
- Comic strips
- Mental health awareness
- Alternative Health and wellness
- Political opinion or manifestos
- Social issues
- Community groups
- Charity outreach
- Spirituality and Religion
- Alternative local guides
- Current events
- Confessions
How to Make a Zine in 10 Easy Steps
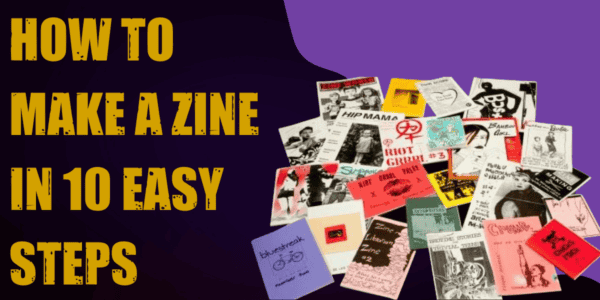
Now that we know what zines are all about let’s look at how to make one. In this guide, I’ll be focusing on making zines the traditional way; in print.
- Decide on your theme
You might already know exactly what kind of zine you want to make, but if not, try brainstorming to narrow down your ideas.
Begin by making a list of subjects you’re interested in or passionate about. Then, underneath each one, create a list of content ideas you could include in a zine on that subject.
During this process, you’ll probably find that some of your interests have much more scope for zine content than others, and this should help you decide the direction you want to go in. Remember that if you’re creating a periodical zine, it’s best to choose a broad topic that allows for plenty of new content in the future. - Choose a name
Naming your zine can be one of the most time-consuming parts of the process. After all, the name is the first thing your readers will see, so you want to make sure it represents your message well. Ask friends and family to help you brainstorm ideas if you’re stuck.
- Plan your features
Once you’ve settled on the overall theme and title of your zine, it’s time to plan out the content.
Start by making a list of features you want to include (you might already have some good ideas from Step 1), and flesh each one out into a rough template. Consider how many words and images each feature will contain and map its layout and the number of pages it’ll take up.
For example, a feature about a local band might include a 650-word interview alongside two photos of a live performance and details of their upcoming tour, taking up a full double-page spread.
When you’ve mapped out each feature in this way, you’ll know the number of pages you need in your zine. - Choose a format
Zines come in many different shapes and sizes. There are one-page poster zines, eight-page mini zines, zines bound with stitching, zines made from recycled newspaper, scroll style zines, accordion-style zines; the list really is endless! But the most common format of all is a basic folded paper booklet held together with staples.
In this guide, I’ll show you how to make one of these stapled zines with a little help from a Microsoft Word template. This basic, no-frills design is one of the quickest, easiest and cheapest ways to begin sharing your creativity, passion, and message with your audience straight away.
Note: This example has twelve pages, but there are countless free templates with fewer or more pages to choose from to suit your own needs. - Use a template
This zine uses simple sheets of printer paper folded in half to make twelve pages. Each individual sheet of paper creates four different pages, but they won’t be in consecutive order.
That’s why booklet templates, such as this one from Microsoft Word, are perfect for making zines; each page is prenumbered, making it much easier to map out and insert content and arrange the pages once you’ve printed them.
Open up your template, and begin importing images and inputting text and logos in the appropriate places using the plans you made in Step 3.
Remember to leave a space on the inside edge of each page to allow room for folding and stapling the spine. The premade word templates like the one above will automatically allow for this, but if you’re working without a template, always include a half-inch gutter.
You can design your entire zine digitally on Microsoft Word, but part of the fun of zine creation comes from using analog methods, too; for example, handwriting, drawing, and collage. If you’re going to add your own artistic flair the old-fashioned way, leave blank areas on your template that can be worked on by hand after you’ve printed your pages out. - Print a master copy
Once you’ve finished your digital arrangement on Microsoft Word, it’s time to print a master copy. For this twelve-page zine, you’ll only need three sheets of printer paper in total, as you’ll be using both sides.
Start by printing the pages with the lowest odd numbers on the left-hand side; in this case, page 12/1, page 10/3, and page 8/5.
Then, flip them over, feed them back into your printer, and print the remaining pages on the reverse side, so they’re all in order.
Now, it’s time to add any analog elements to your zine, for example, handwriting, drawings or collage, etc.
Once this is done, pat yourself on the back; you now have a master copy of your zine! - Make copies
First of all, decide how many copies of your zine you want to produce. Think about who you’ll be distributing it to and how far you’d like your message to spread. If you’re not sure, you can always start with a small run at first and print more later on.
You can make copies at home by either photocopying or using a scanner/printer. Whichever method you use, remember to layout the pages in the same order that you printed the master copy (the lowest odd numbers on the left-hand side first, e.g., page 12/1, page 10/3, and page 8/5).
Copy these three sides the required amount of times first. Then, flip the pages of your master copy over and copy the remaining pages onto the reverse side of each newly printed page.
If you don’t have access to a photocopier or a scanner/printer, you can use a local printing store in your area that will take care of the process for you. Generally, black and white photocopying services are super affordable and will work out cheaper than doing it home if you’re printing a large run. - Fold the pages
The most accurate way to fold your pages is to use a scoring tool like a bone folder, but if you don’t have one to hand, you can improvise with a butter knife or a ballpoint pen with the ink tube removed.
Hold a ruler firmly in place at the center of each page where the fold will be, and gently run your scoring tool along the paper 2 or 3 times. Then, fold each sheet in half along the scoreline to create the finished pages of your zine. Repeat until every page is folded in the same position. - Staple it together
Stapling is the easiest and quickest method of binding your zine together.
Here’s how to do it:
Prepare your zine for stapling by arranging the newly folded pages in the correct order and closing them to form a booklet.
Make sure that all the pages line up correctly, and once you’re happy, open the zine to the middle page, and flip it over onto a clean flat surface, so that the front and back covers are facing up.
Now, take a regular office stapler to fire two staples lengthways into the spine, one at the top quarter and one at the bottom quarter.
Flip the booklet over so the inner pages are facing up, and inspect the staples to make sure they sit correctly and feel secure.
Note: Some office-style staplers are too short of reaching the spine of a standard-sized zine, but as long as the arms swing open, it’s not a problem. Just follow the steps below.
Slide a piece of corrugated cardboard, foam, or another soft, protective material, underneath the zine. Just like the method above, keep the booklet open in the middle, with the front and back cover facing up.
Adjust the stapler into the open arm position. Push down firmly on the deploying end to insert the staples in the same direction as the spine, one at the top quarter and one at the bottom quarter.
Flip the zine over and inspect the staples. The protective sheet of cardboard or foam will most likely be attached. If so, gently open the prongs to release them and fold them back down again, being careful to avoid the sharp ends.
Finally, take a hard, solid object (a small hammer is ideal) and lightly tap the staples to fully seal them against the spine.
Stapling with these methods is easy, cheap, and quick, but there are plenty of other ways to bind your zine together.
Here are two you can try at home:
–Hole punch and string
Make two sets of holes along the spine of the book using an office hole punch, and tie a loop of string around each one. This adds a simple yet decorative element to your zine.
–Stitch binding
This is a more time-consuming method, but the results look fantastic, and the binding is more secure than both the staple and hole punch methods.
To stitch bind, create a set of evenly spaced holes along the spine of the zine using a needle and stitch them together with thread in a cross-stitch format or figure of eight loops. - Distribute your zine
Congratulations! You now have a fully formed zine to show off to the world.
The most obvious place to start distributing your zine is to your friends and family, but what if you want to reach a wider audience? Whether you’re selling copies or giving them away for free, here are a few ideas to get your zine seen by as many people as possible.
–Local businesses
Independent bookstores, record stores, cafes, and bars are just a few of the businesses in your local area that might be interested in stocking your zine to distribute to their customers.
The businesses you approach will depend on the nature of your content. For example, if your zine is all about vegan activism, then approaching your local vegan restaurant or organic grocery store is a good place to start.
–Zine fairs
Zine fairs are becoming more and more popular, especially in bigger cities. They’re a great way to showcase your zines and connect and share ideas with other independent creatives. Check out your local area for any upcoming events.
–Art galleries, cultural centers, and community hubs
Your local cultural center might be interested in stocking and distributing your zine if the content matches their ethos. This is a particularly good option if you’re giving copies of your zine away for free rather than selling them.
–Create a digital copy and work with a ‘distro.’
A distro is a person who prints and distributes zines on behalf of their creators. More often than not, distros are just regular people who love zines and have access to a good printer, but some have branched out and set up a fully professional operation.
To find a distro willing to print, bind and distribute your zine, check out online zine communities on Reddit and social media, and browse through this list of active distros in various locations around the world.
Conclusion
Zines are a creative and powerful tool to spread important ideas that you won’t find in mainstream, big business periodicals. And the best part is, anyone can make one!
Are you a zine creator yourself? I’d love to check out your work and hear your tips and tricks for creating great zines. Post a comment below and include a link to your zine if you have one.